
Setting up your email on an iPhone is easy and lets you check your messages on the go. Whether you use Gmail, Yahoo, Outlook, or another provider, iOS supports most email accounts with simple setup options. Here’s a step-by-step guide to get your email up and running in no time.
🛠️ Before You Start:
Make sure you have your email address and password handy. If your account uses two-factor authentication, have your authentication device ready as well.
📱 ADDING A NEW EMAIL ACCOUNT
📧 CUSTOMIZING YOUR MAIL SETTINGS

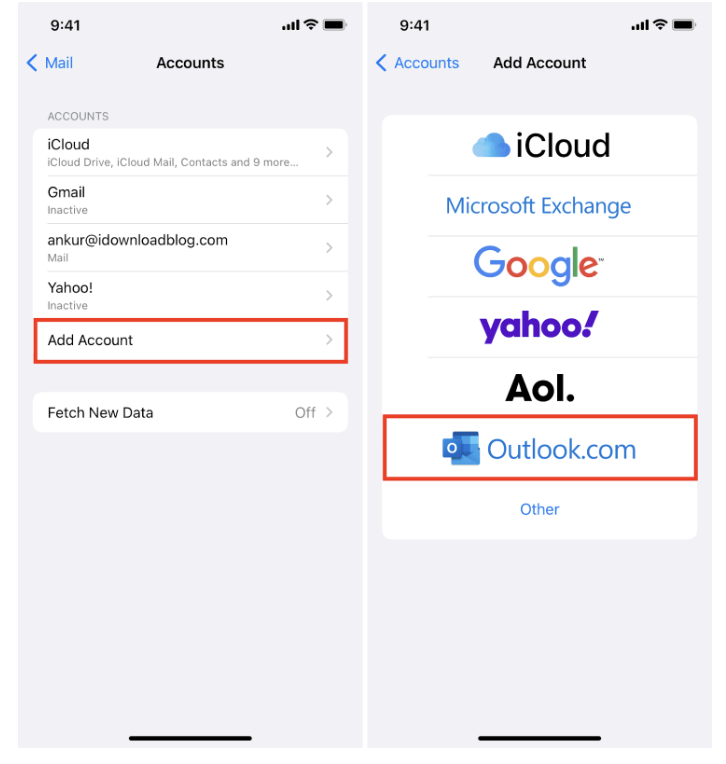
📩 ADDING OTHER EMAIL PROVIDERS
If your provider isn’t listed, tap Other when adding an account. You’ll need to enter your incoming and outgoing mail server details, which you can usually find on your email provider’s website or support pages.
All done! Your email is now ready to use, and you can send and receive messages from the Mail app right away.
✅ Optional Tip:
If you use multiple email accounts, you can add them all to the Mail app and switch between inboxes easily. You can also set a default account for sending new emails in Settings > Mail > Default Account.
❓ Frequently Asked Questions
Can I add multiple email accounts to my iPhone?
Yes, you can add as many accounts as you like and manage them all in the Mail app.
What if I forget my email password during setup?
You’ll need to reset your password on your email provider’s website before adding the account to your iPhone.
Will emails sync automatically?
By default, yes—your iPhone will fetch new emails automatically, but you can adjust this in the account settings.
Can I delete an email account from my iPhone?
Yes—go to Settings > Mail > Accounts, select the account, and tap Delete Account.